 RapidRAW
Twice the Pixels, None of the Fake Texture
How I built RapidRes, RapidRAW's 2x AI upscaling: what didn't work, why a tiny model beat the big ones, and why it had to learn to keep the grain.

Sometimes you want more pixels than your camera gave you. A crop that should be a big print, a bird that ended up small in the frame, an older camera with fewer megapixels. So for v1.7.0 I built RapidRes, a 2x AI upscaler that runs right inside RapidRAW.
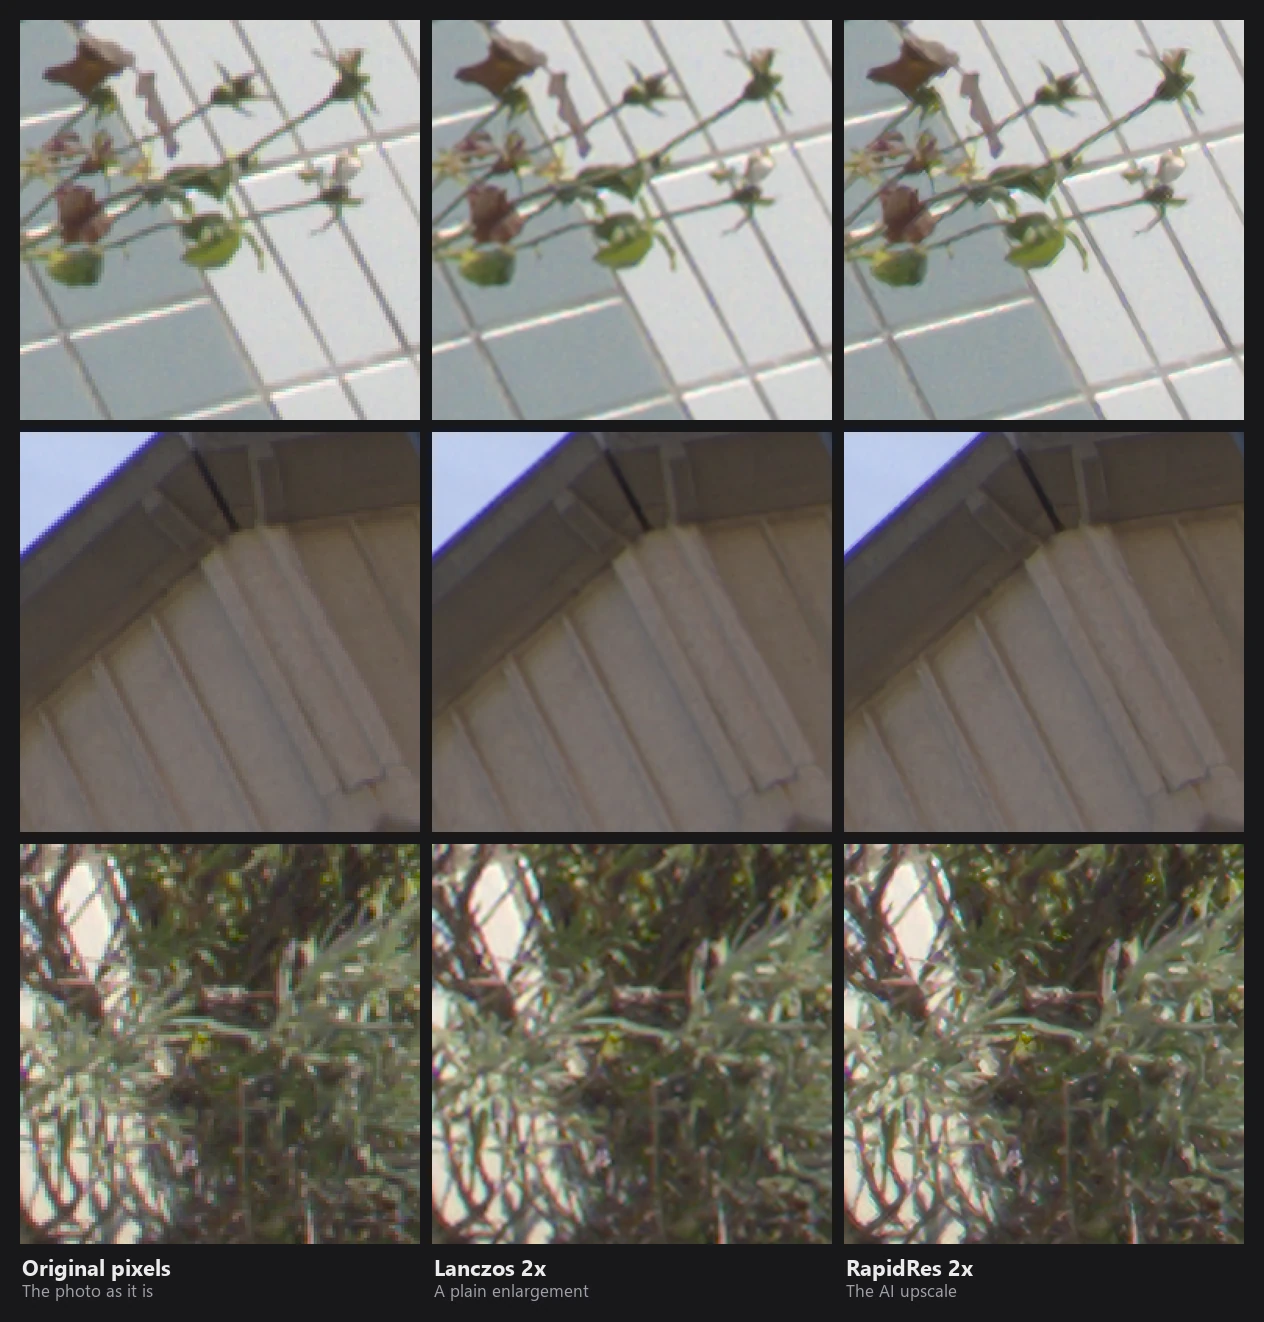
There was one rule from the start: it has to be faithful. A lot of AI upscalers make photos look sharp by inventing texture that was never there. I wanted the opposite: more usable resolution, with detail that looks like it came from a better camera, not from a painting.
First try: no AI at all
Before reaching for AI, I tried to get more out of the classic methods. I combined demosaicing and 2x upscaling into one step, and tried sharpening the image back during demosaicing (deconvolution).
It barely helped. Compared to the normal pipeline followed by a good plain enlargement (Lanczos), it gained about 0.2 dB. To give you a feeling for the number: dB here measures how close a result is to the real, full-resolution image, and 0.2 dB is hard to see. A single photo just doesn't hold much more information than it shows.
So it had to be AI. I built it the same way as AI Denoise: it runs in the background, shows its progress, is cached on disk and in memory, and goes through the same AI job queue.
Picking a model: small and honest beats big and flashy
I tested a lot of models, from 0.4 million to almost 12 million parameters. The interesting part: every model that tries to stay faithful hit the same ceiling, about +0.5 dB over Lanczos. The bigger ones weren't better.
The "real-world" models you might know from Stable Diffusion tools, like Real-ESRGAN, were about 2 dB worse. They look impressive at first glance, but on real photos they drew dark outlines around things, made up texture, and several of them shifted the colors.
I picked 2xBHI_small_span_pretrain by Philip Hofmann (SPAN architecture, CC BY 4.0). With 0.41 million parameters it's tiny, fast, faithful, and it doesn't leave seams when the photo is processed in tiles. Thank you, Philip!
Teaching it RapidRAW's own pipeline
A model trained on generic images doesn't know what a RAW file looks like after RapidRAW has demosaiced it. So I fine-tuned it on exactly that.
The idea is simple: take real RAW files, make them 4x smaller, and use those as the "perfect" answer. Then degrade them the way a camera would (a little optical blur, the color filter pattern of the sensor, sensor noise) and run them through RapidRAW's demosaicing, color conversion and pre-sharpening. The model learns to turn the second into the first.
This is the setup of the version that shipped. The develop pass includes highlight reconstruction, color noise reduction and pre-sharpening, and the grain in the target comes in later in this story.
That first round gave +1.0 dB on clean photos and +1.7 dB on noisy ones, and it stopped making color noise worse.
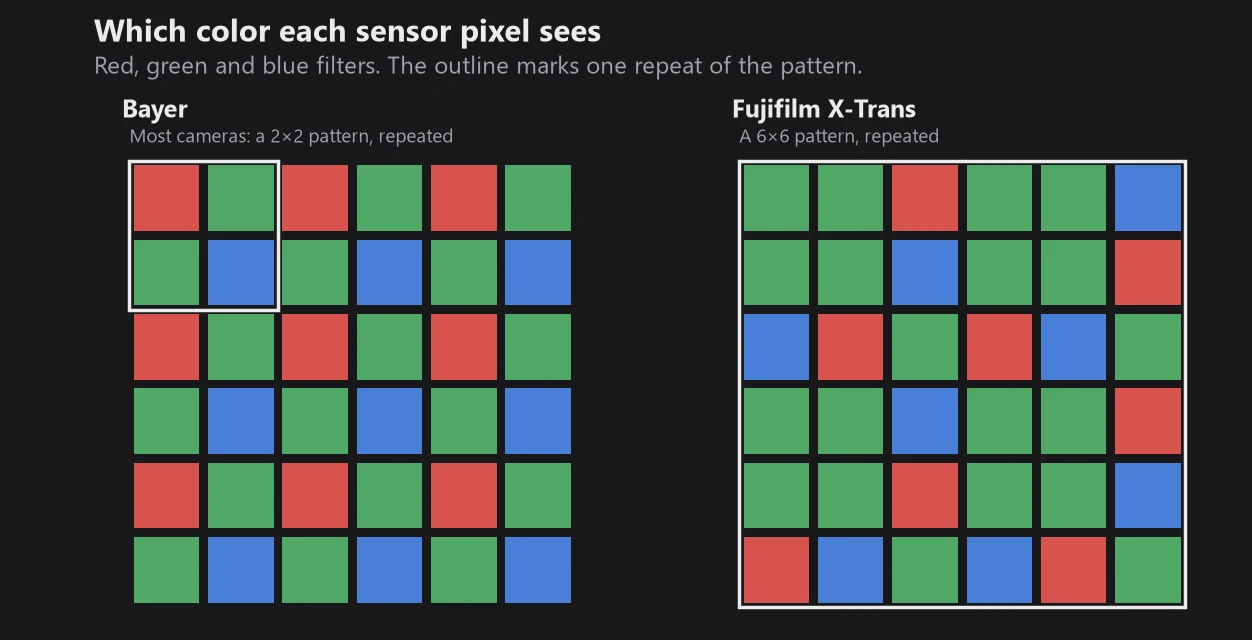
For the second version I went further: every training image went through the app's real GPU pipeline, the same one your photos go through, including highlight reconstruction and color noise reduction. And since there weren't enough Fujifilm X-Trans files, I took normal RAW files, rebuilt them with the 6×6 X-Trans pattern and ran them through the real X-Trans demosaicing. Two out of every five training images are X-Trans now.
I also tried a much bigger model one more time: RealPLKSR, with 7.4 million parameters, 18 times the size. Out of the box it was 0.08 dB better than the tiny one, and about 17 times slower (44 seconds instead of 2.6 for a 24 MP photo on an RTX 4070). Model size really isn't what limits this.
Here's where the fine-tuning ended up, measured on real RAW files the model never saw during training:

The surprise: it became a denoiser
Version two won on every number. Then I looked at real photos, and something was off. It smoothed grain away and turned wall texture into something slightly painterly. It had quietly learned to denoise.
That sounds nice, but it's wrong for RapidRAW. Noise reduction is AI Denoise's job, and the two work together: when both are on, AI Denoise blends between an upscaled noisy version and an upscaled denoised version, and its slider sets the mix. That only works if the upscaler leaves the noise alone.
So for version three, the one that shipped, the training targets carry matching grain at 2x resolution, calibrated to the noise RapidRAW actually keeps. The numbers barely moved (within about 0.1 to 0.17 dB of version two), but the photos changed a lot. High-ISO Fuji files went from blotchy, worm-like texture (first version) or a smooth plastic look (second version) to clean results with fine, natural grain.
The Detail slider
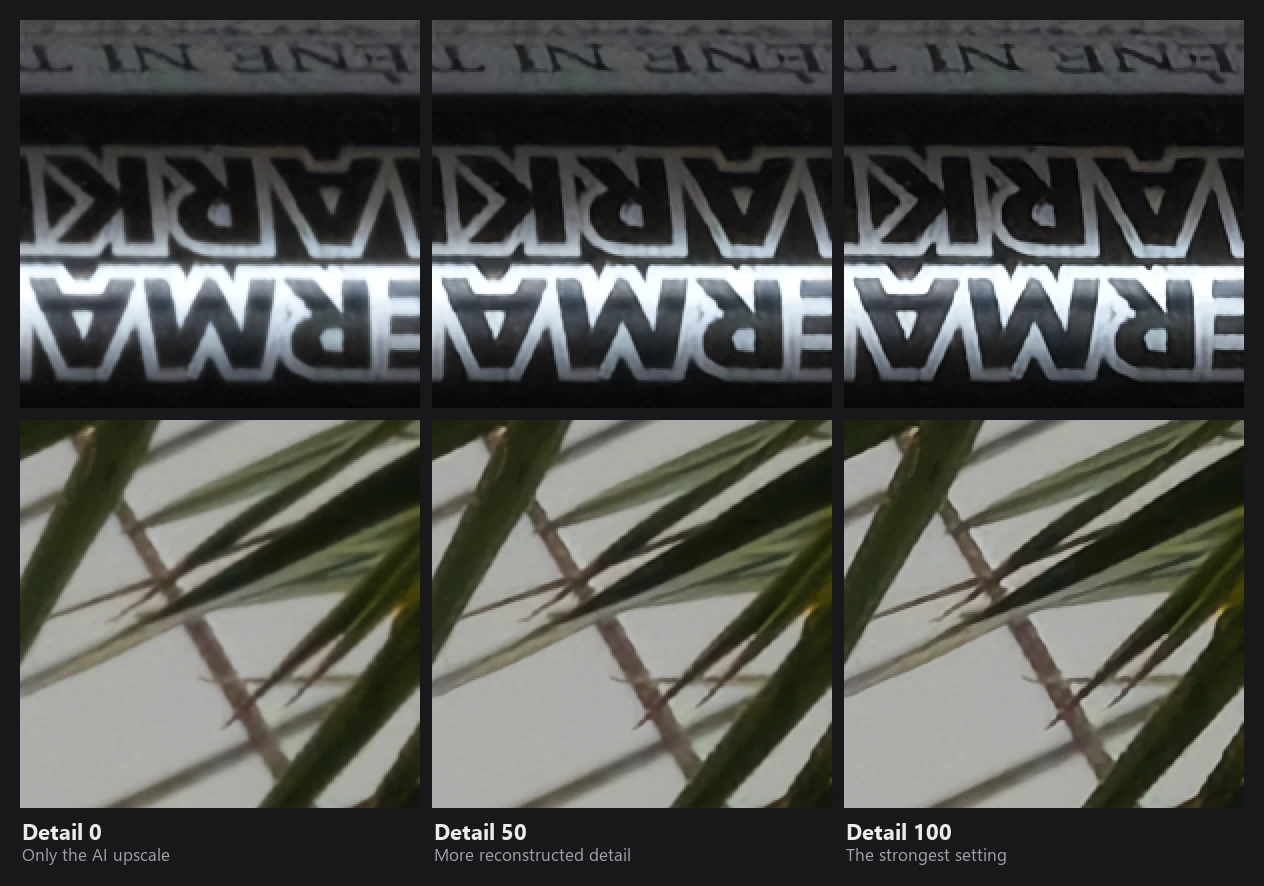
RapidRes has one slider: Detail. It only boosts the detail the AI reconstructed, which is the difference between the AI result and a plain 2x enlargement.
A few things keep it natural:
- It only works on brightness, so it can't create color fringes.
- It knows how noisy your photo is and doesn't boost flat grain.
- It can't push a pixel far beyond its neighbors, so there are no halos.
It costs about 0.17 seconds on a 24 MP photo, so the slider reacts right away. The default is 30.
Speed
On an RTX 4070, upscaling a 25 MP photo takes about 4.9 seconds. It used to be 7.3: I made the work around the model run at the same time as the model itself, with exactly the same result.
Still, not everyone has a fast GPU, so RapidRes is a switch you turn on per photo, not something that runs every time you open one.
Try it
RapidRes is in RapidRAW v1.7.0. Open a photo, go to the Details panel and turn on RapidRes 2x in the RapidRes section. The model downloads the first time you use it. To upscale many photos at once, select them and choose RapidRes (2x) from the right-click menu. Your exports then come out at twice the width and height.
Try it on a photo you've always wanted to print bigger, and let me know how it looks on Discord. If something looks off, please open an issue on GitHub.