 RapidRAW
Furka: A New Rendering Engine for RapidRAW
Why a trip to Öschinensee made me rebuild RapidRAW's engine from the RAW file to the tone sliders, and what that means for your photos.

A few weeks ago I went to Öschinensee. If you've never been there: it's a lake above Kandersteg in the Bernese Alps, at about 1,600 m, surrounded by huge rock walls with snow on the peaks. One of my favorite places to photograph, and one of the hardest.
The hard part is the light. By the afternoon the whole valley sits in deep shadow, while the snow on the peaks is still in full sun. That's a huge range between the brightest and the darkest part of the same photo, much more than a screen can show. A RAW file holds most of it, but the editor has to bring it back without breaking anything: texture in the snow, detail in the shaded rock, and a clean sky where the two meet.
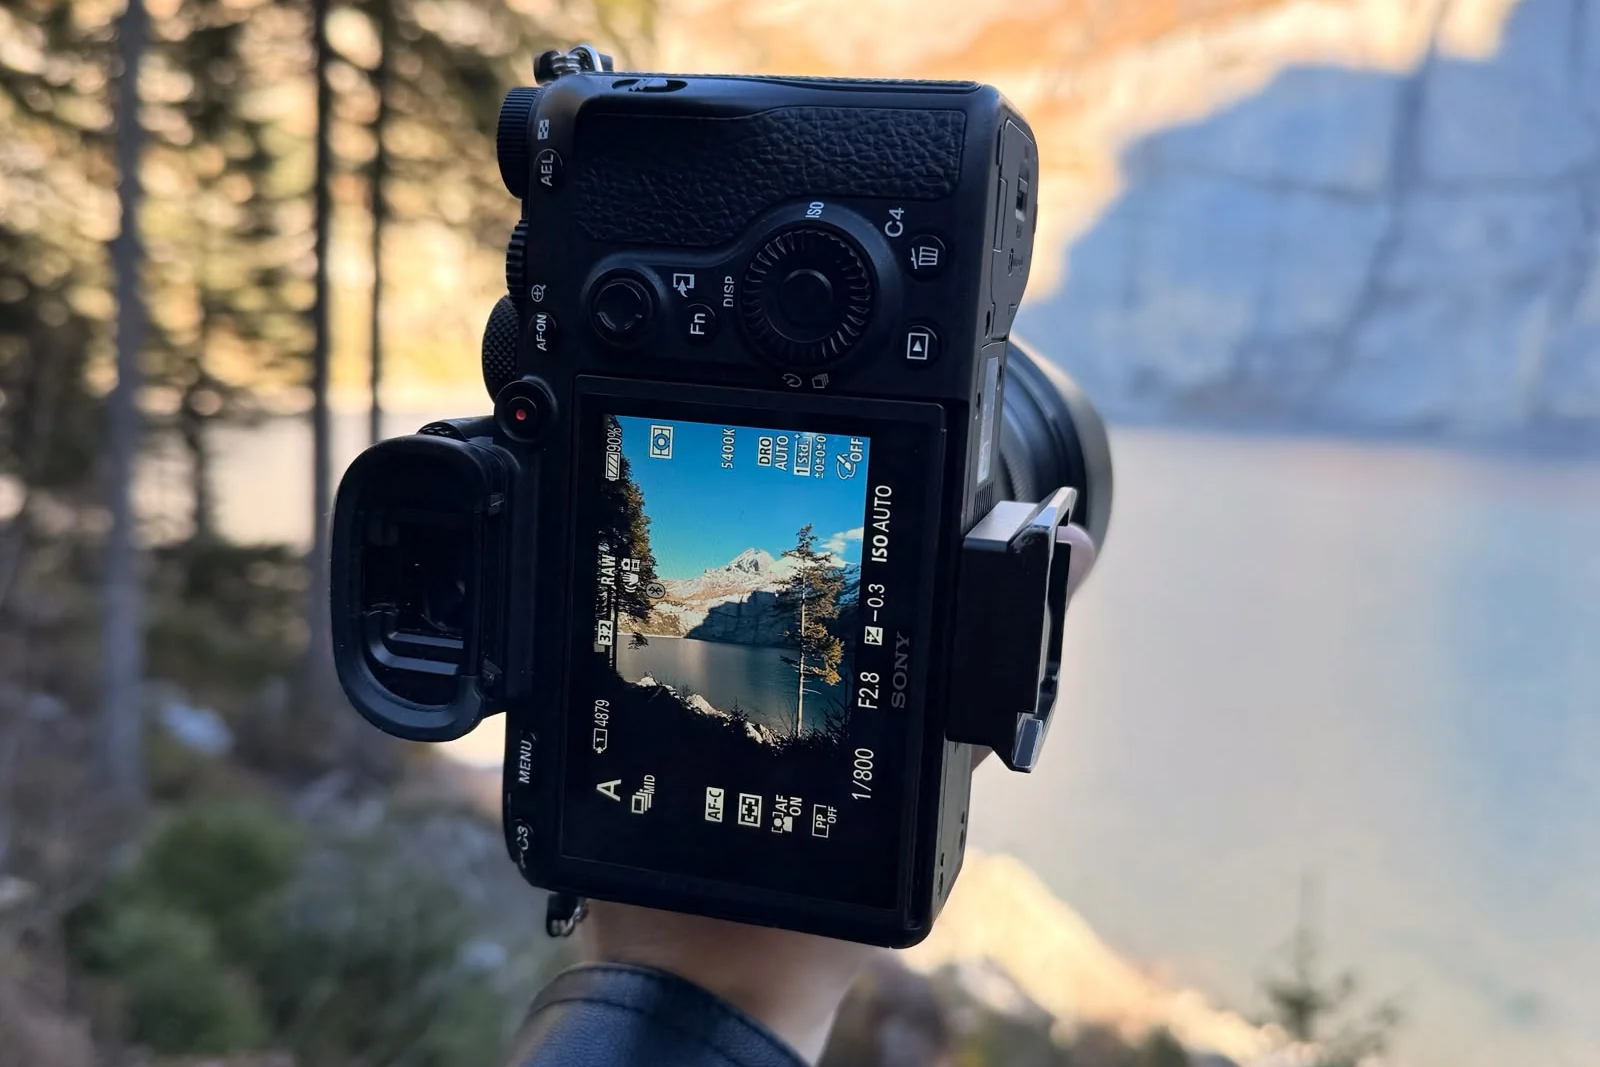
Back home in RapidRAW, all three went wrong. Pulling the highlights down turned the snow flat and grey. Lifting the shaded rock turned the blacks muddy. And above the ridge, a bright halo traced the whole outline of the mountains, like someone had gone over them with a soft white brush.
These are exactly the photos RapidRAW should be great at, so small fixes weren't enough. That's Furka, the new rendering engine in RapidRAW v1.7.0. I rebuilt it from the RAW file all the way to the final tone sliders, and named it after the Furka Pass in the header photo, one of my favorite places in the Alps.
The halo above the ridge
Let's start with the thing that annoyed me most.
Clarity and Structure add local contrast: they make a part of the photo stand out from its surroundings. To do that, RapidRAW first needs a smooth, blurry version of the photo as a reference. The old engine's version blurred a little across strong edges, so near the ridge, some of the bright sky mixed into the dark rock and the other way around. Clarity then amplified that mix, and you got a bright rim in the sky along every mountain.
Furka's reference is built differently. It is measured in stops, like your camera's exposure, and it refuses to blur across a big jump in brightness. A ridge against the sky is several stops apart, so the sky and the rock are never mixed, and there is nothing for Clarity to turn into a halo.
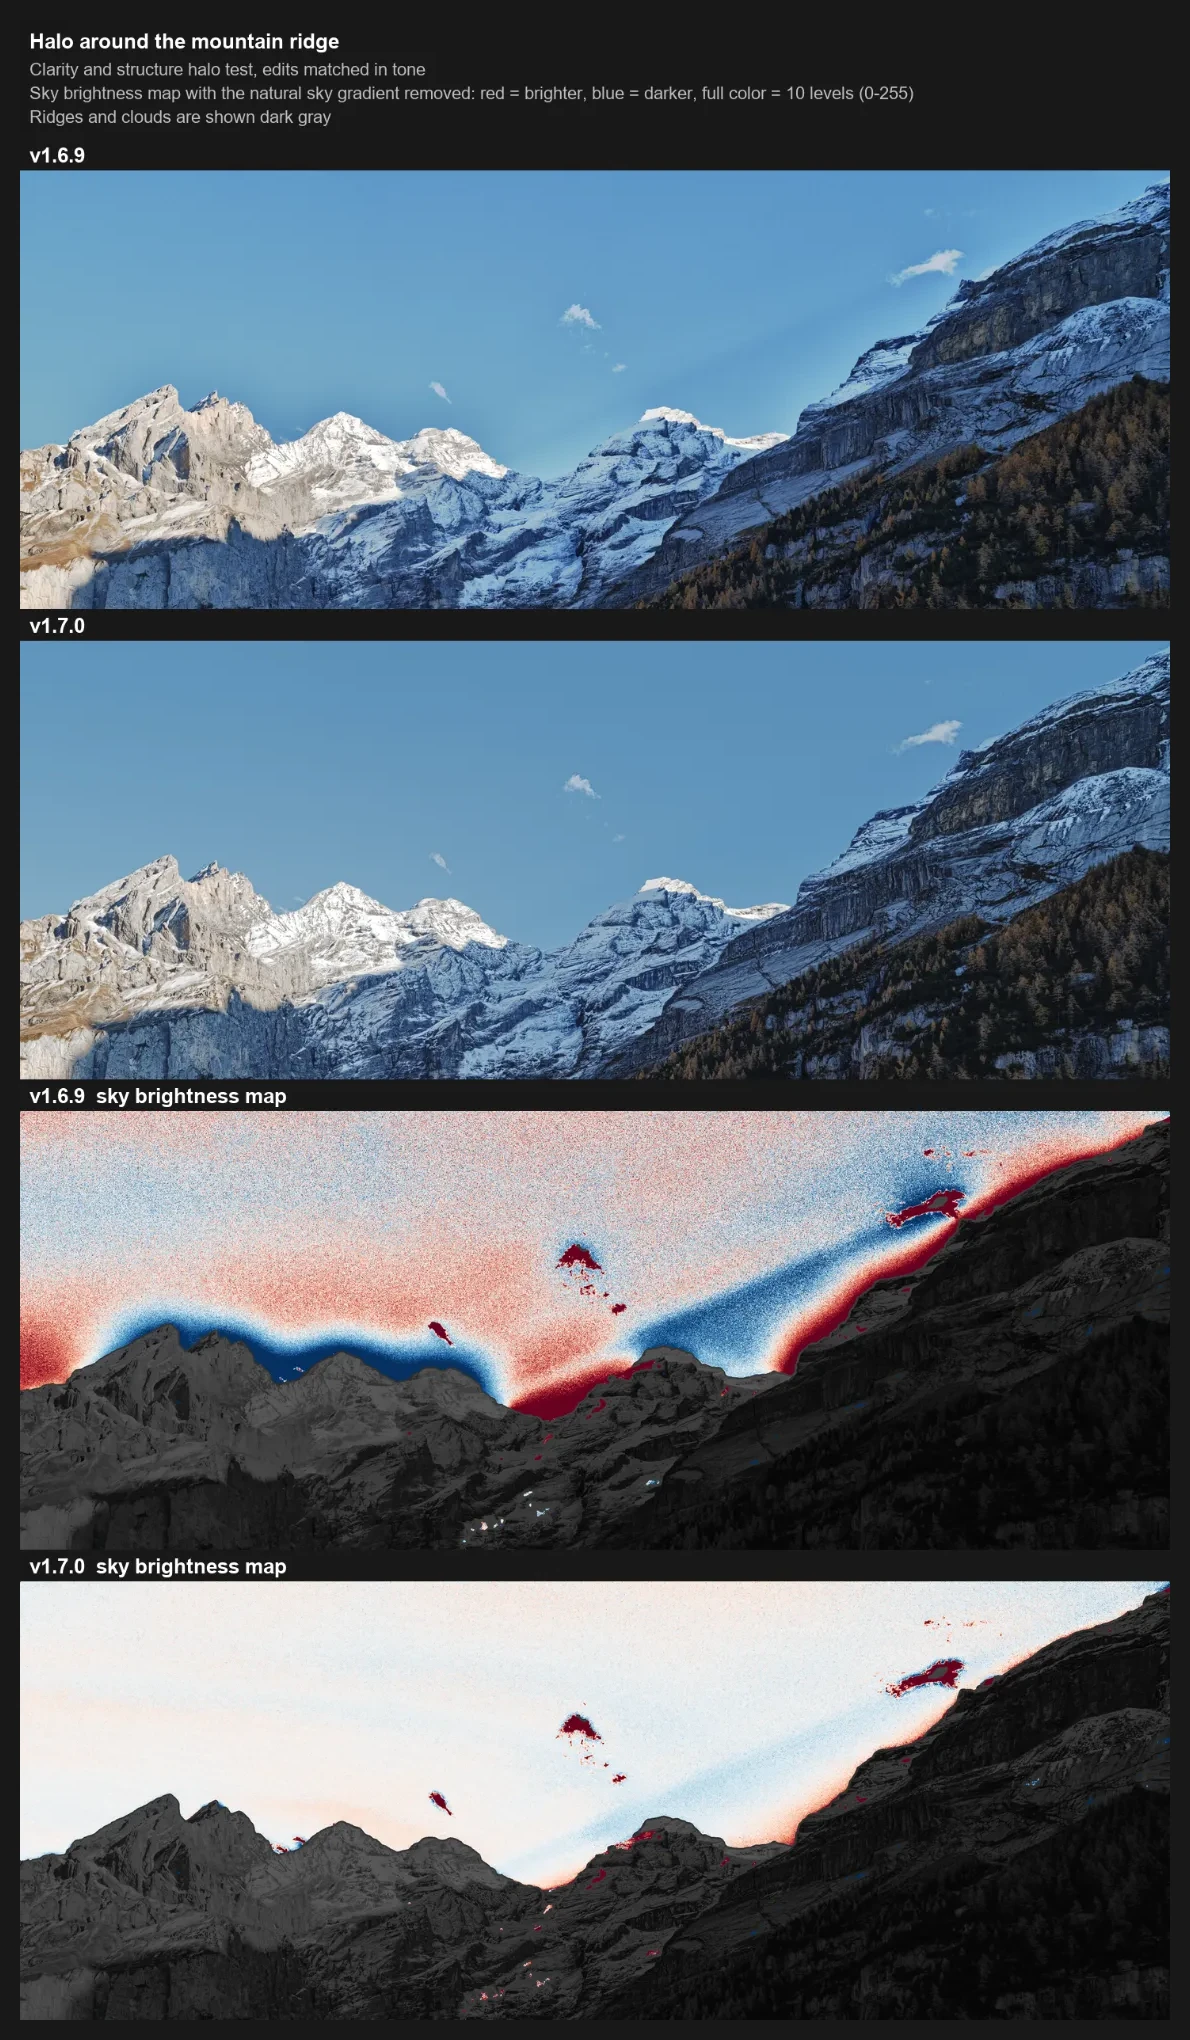
The two maps at the bottom show how much brighter (red) or darker (blue) each part of the sky is than it should be, with the natural sky gradient removed. In the old engine, bands of both follow the outline of the mountains: that's the halo. With Furka, they're gone, and the sky behaves like a real sky.
Bright snow that keeps its texture
Sunlit snow is tricky. It's very bright, but it isn't white: it has shape, shadows and texture, and you want to keep all of that.
The new Highlights slider works like turning down the light on the bright parts of the photo, by up to about a stop. It keeps all the fine detail while it does that, so snow and clouds keep their shape instead of turning into flat grey areas. Areas that are almost white and almost neutral are kept clean, so the snow doesn't pick up strange tints.
Whites was rebuilt to work together with it. It now starts right where Highlights leaves off, so the two don't fight over the same tones, and it can't push the brightest parts past each other.
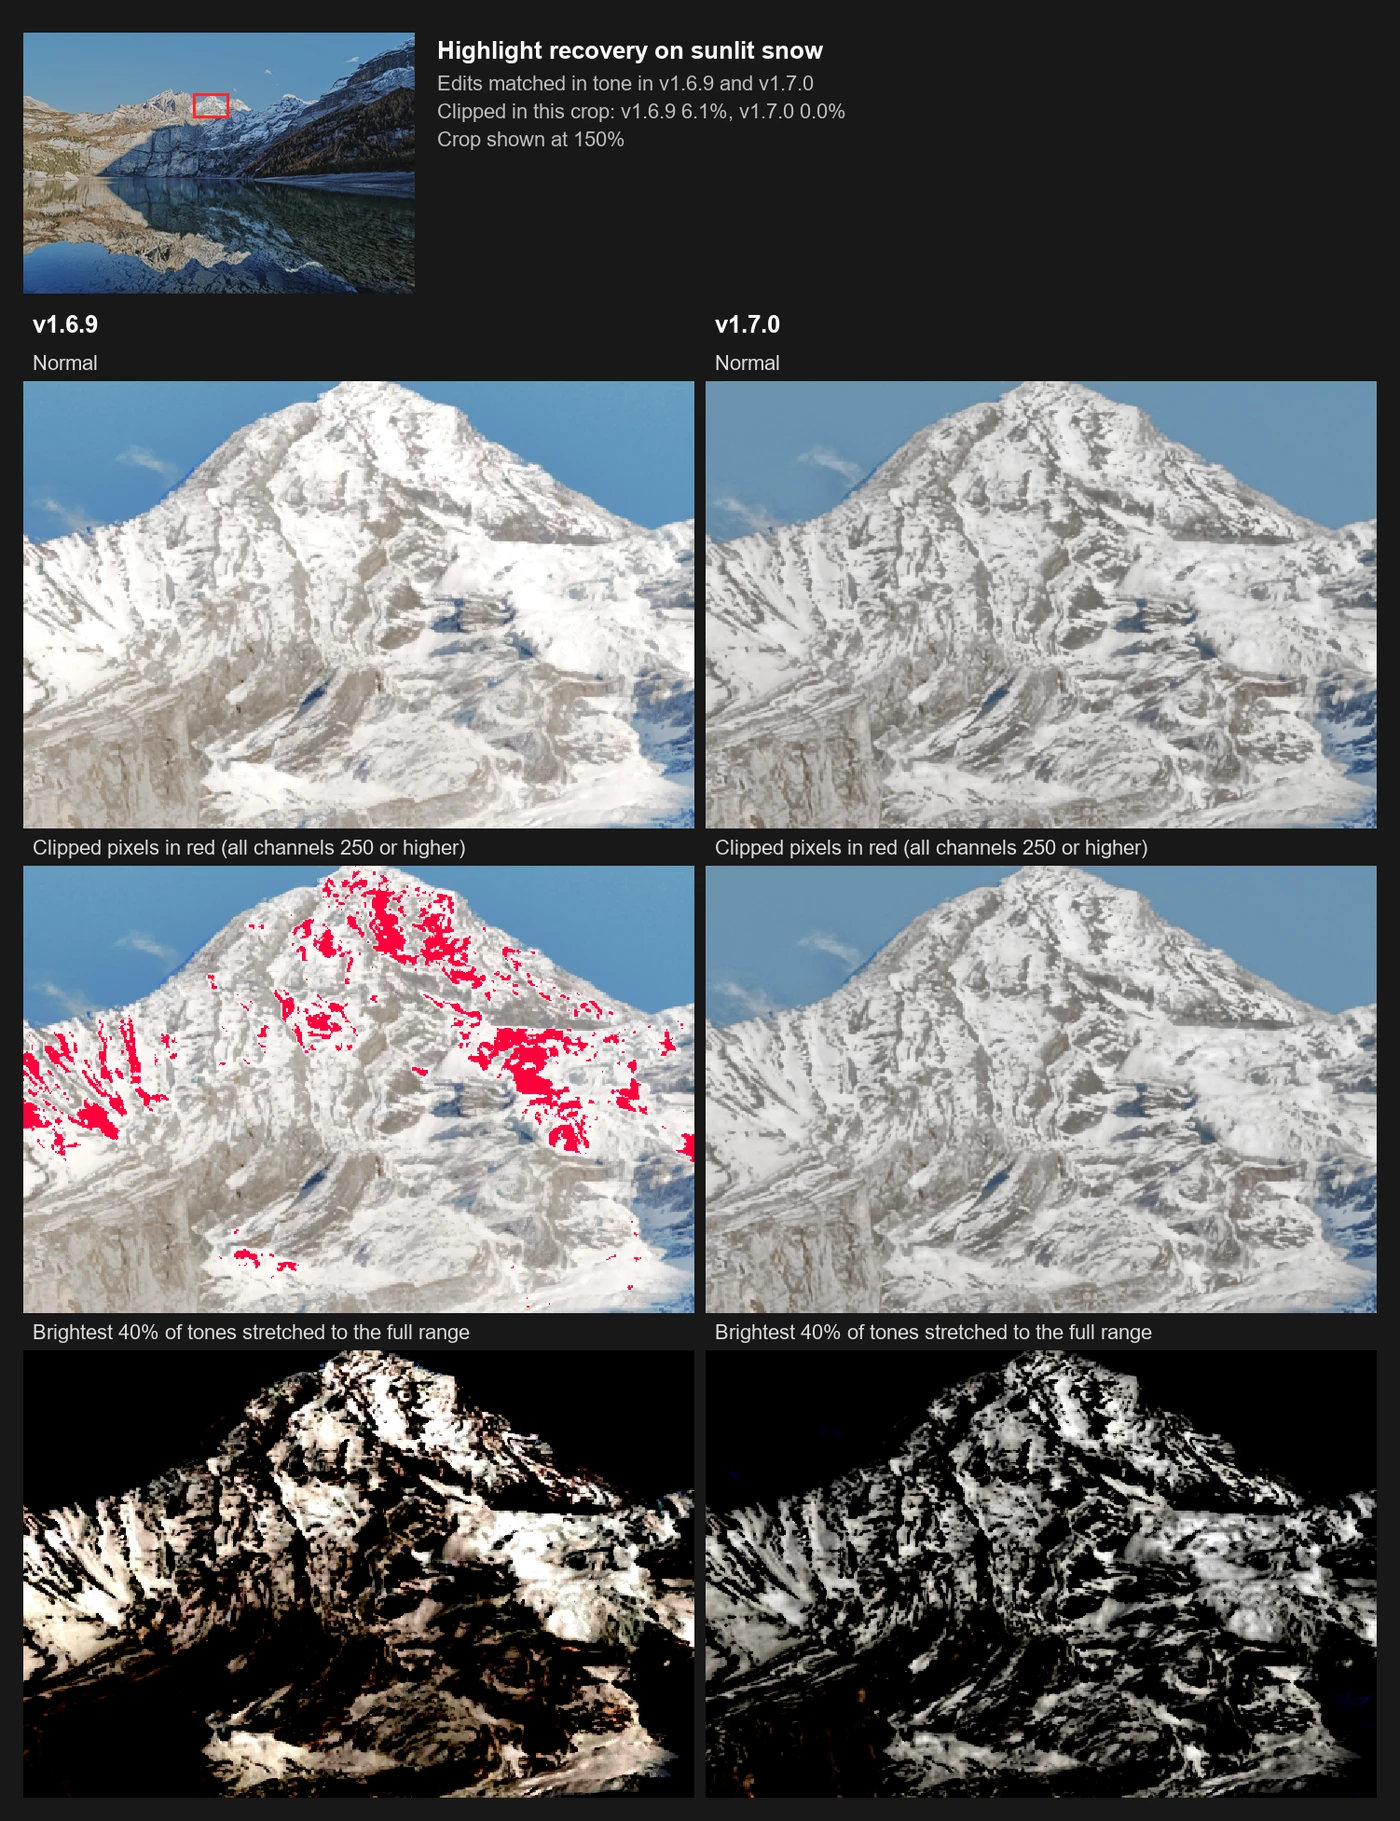
With the edits matched in tone, the old engine clipped 6.1% of this crop to pure white (the red areas). Furka clipped none of it. The bottom row stretches the brightest tones so you can see what's actually there: in Furka, the snow still has all its structure.
Shadows that stay deep
The other half of the problem was the dark rock in the shade.
Shadows now lifts dark areas much more than before, but it leaves the darkest tones alone. Pixels close to pure black aren't lifted at all, and the effect fades in just above them. So you can open up a shaded rock wall without the deepest shadows turning grey.
Contrast was rebuilt too. It used to pivot around a fixed middle grey, which meant that on a dark photo it pushed most of the image toward black. Now it pivots around the photo's own midtones. A dark photo stays a dark photo, and Contrast just makes it punchier.
And Blacks now works after Contrast, so it can bring back detail that Contrast crushed.
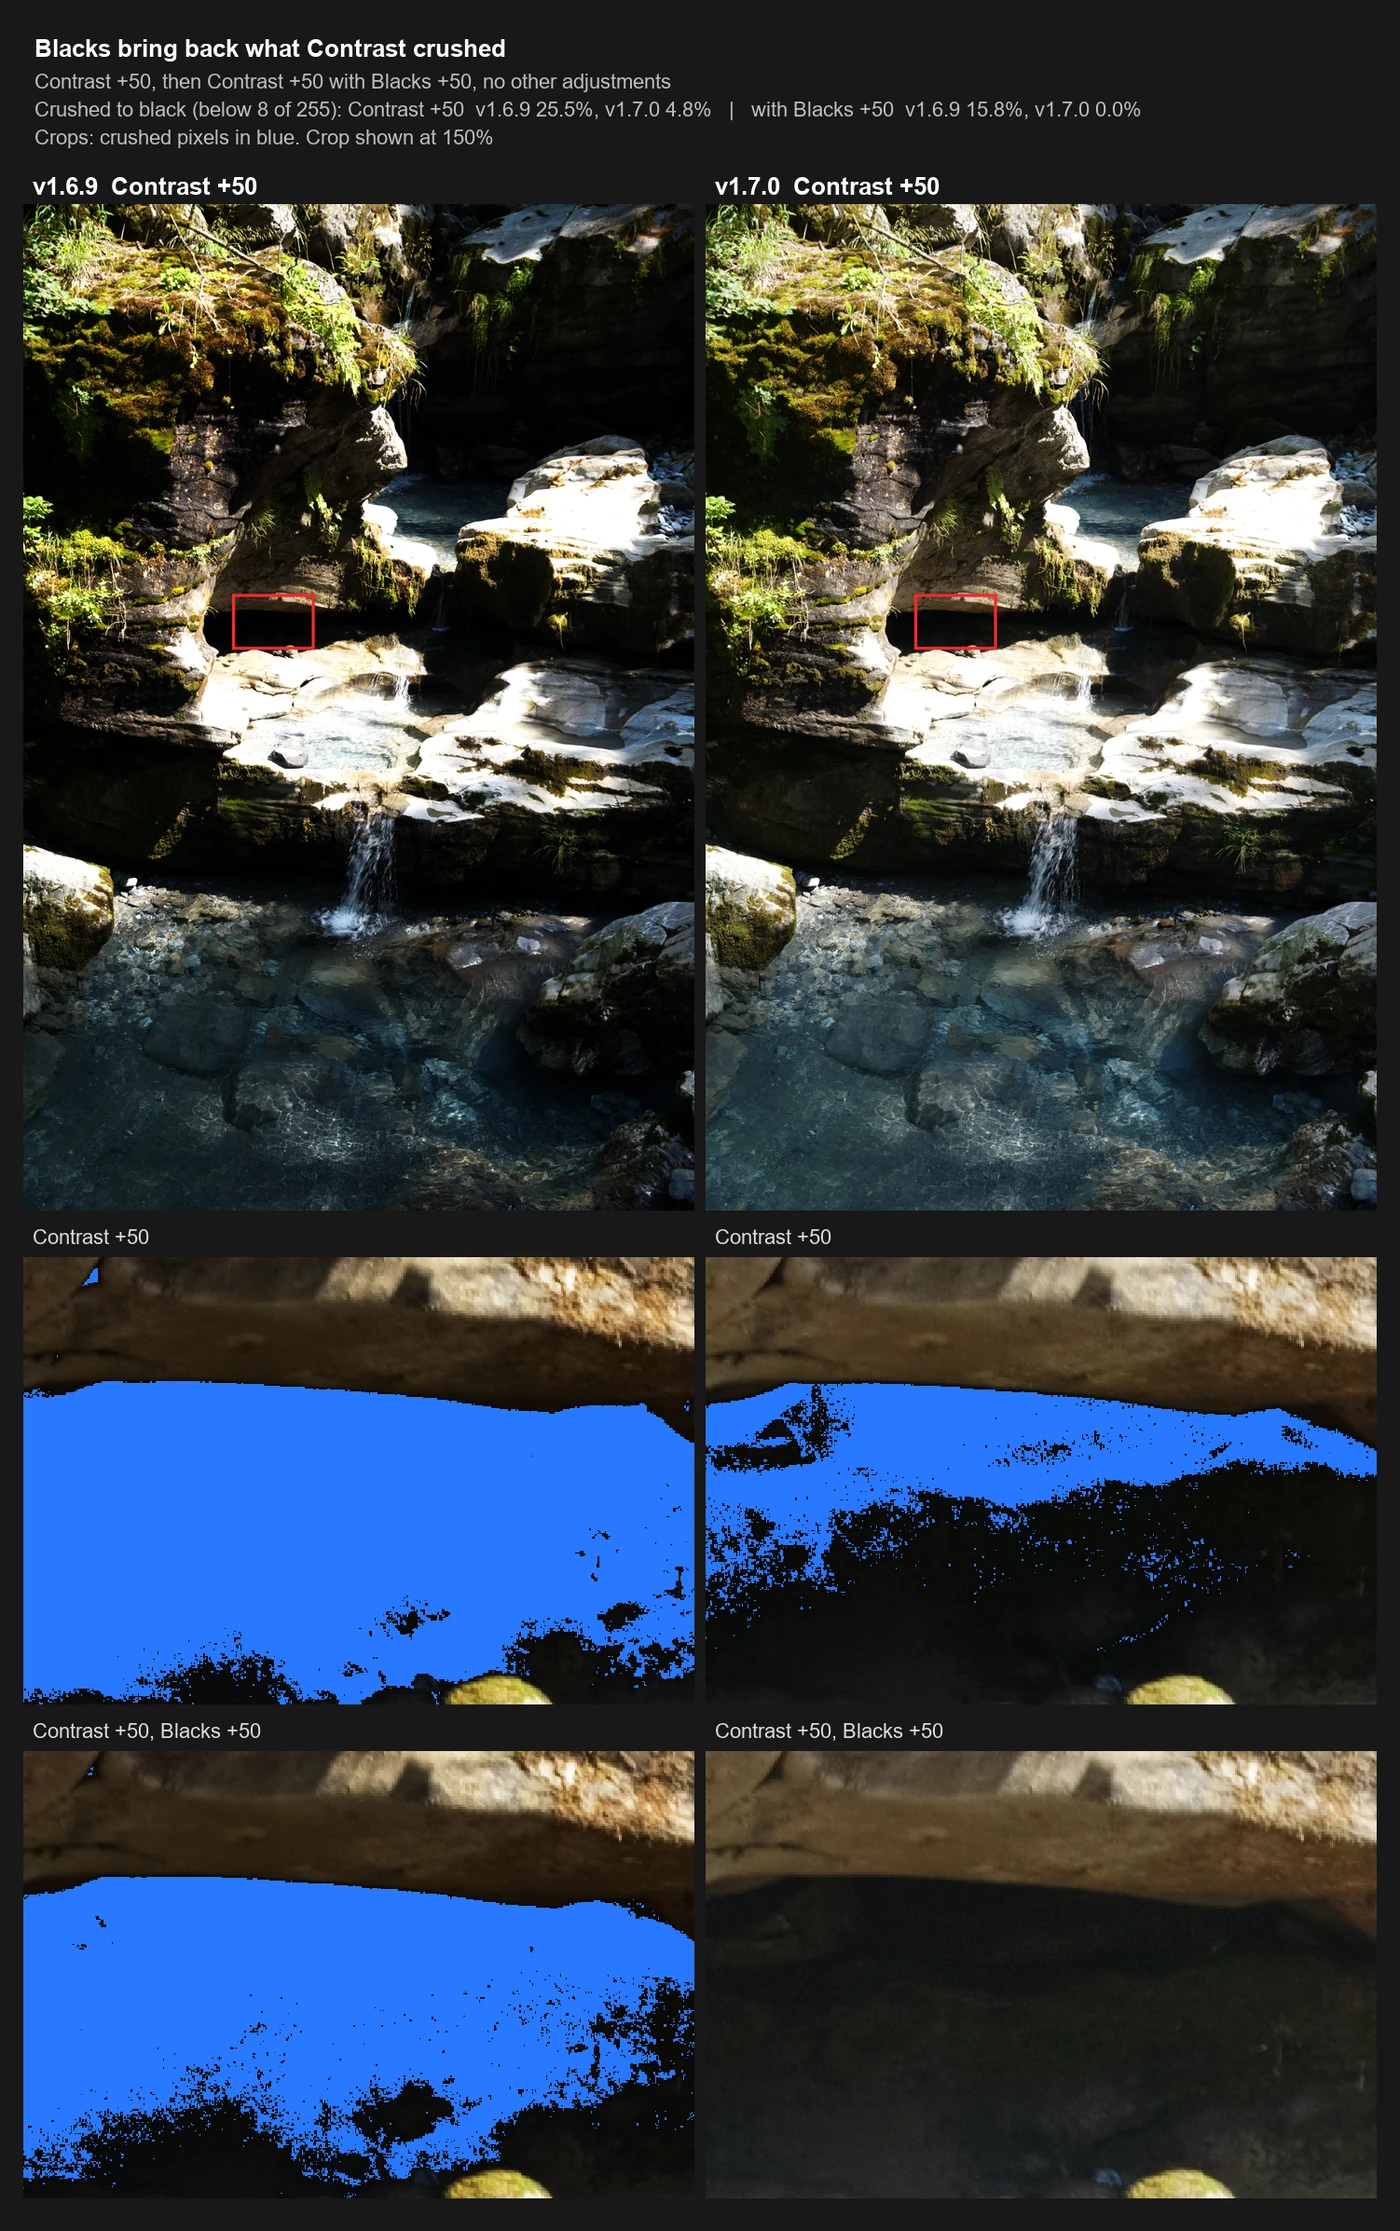
With Contrast +50, the old engine crushed 25.5% of this crop to pure black (the blue areas). Furka crushed 4.8%. Adding Blacks +50 brings it down to 0% in Furka, while the old engine still lost 15.8%.
Here are all the Basic sliders in Furka at a glance, each at four settings. Read each panel like a tone curve: across is the tone before, up is the tone after.

Cleaner detail, right from the RAW file
While I was rebuilding the tone sliders, I also went one step back, to the very start: turning the raw sensor data into a photo.
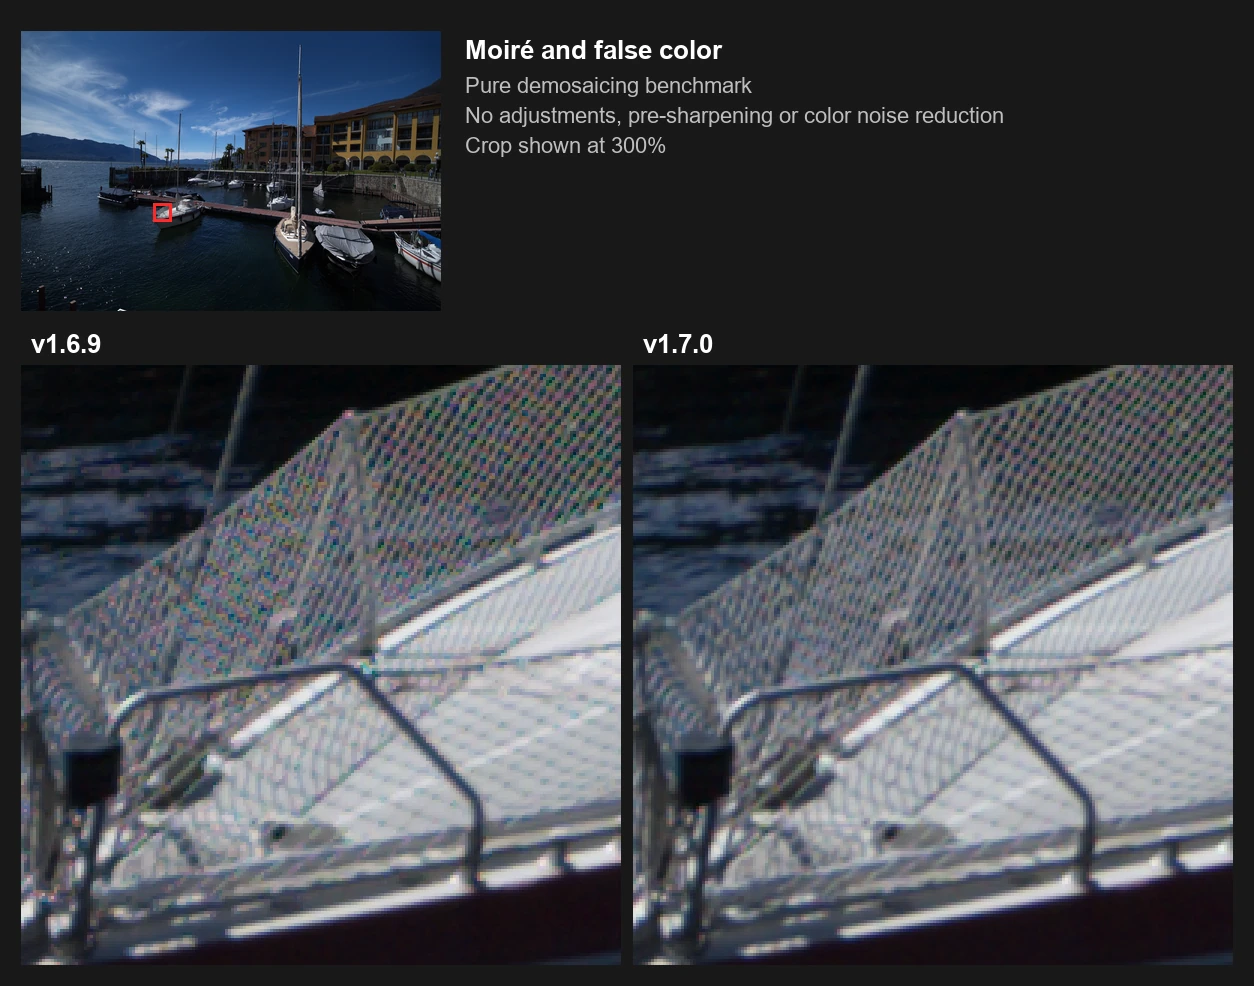
A camera sensor only records one color per pixel: red, green or blue. The other two have to be guessed from the neighbors. This step is called demosaicing, and it's where a lot of ugly artifacts are born: colored speckles in snow, maze-like patterns in fine textures, and moiré on fabric and fences.
Furka now does this on your GPU, with better methods: RCD and residual interpolation for normal sensors, and 3-pass Markesteijn for Fujifilm X-Trans. In simple terms, they first figure out which way an edge runs and then fill in the colors along it, not across it. Red and blue are predicted from the much more detailed green channel, so fine detail doesn't turn into false color.
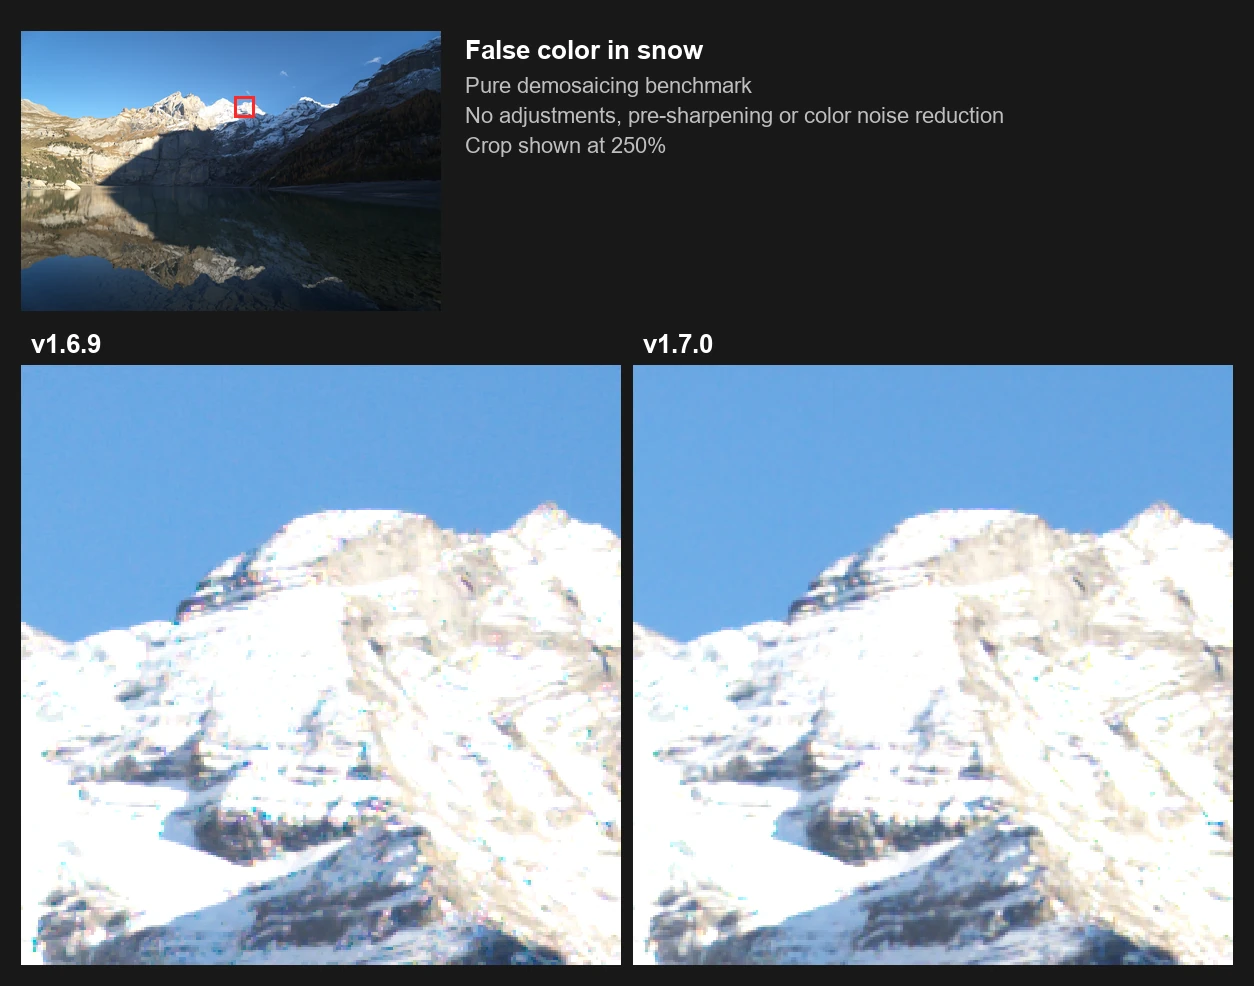
These crops have no adjustments at all, so they show only the demosaicing. Look at the edges of the snow and rock: the old engine sprinkled them with little colored dots.
The same thing on the railing of a boat:
Everything else in Furka
A few more things changed under the hood:
- One GPU develop pass. Highlight reconstruction, color conversion, color noise reduction and pre-sharpening now run together on the GPU, right after demosaicing. Photos open faster, and since decoding runs separately from the screen updates, zooming stays smooth while a RAW file is still loading.
- Halo-free sharpening. Sharpening no longer creates bright rims along strong edges, works the same at every exposure, and negative values soften cleanly instead of making wormy edges.
- Color grading in OKLab. The color grading wheels now work in a perceptual color space, with shadows, midtones and highlights split evenly. A tint now looks just as strong in the shadows as in the highlights.
Your old edits
There's no switch to go back to the old engine, so your existing edits will render with Furka. Your slider values stay the same, but some photos will look a bit different, mostly where you used strong Clarity, Structure, Highlights, Shadows or Contrast. If you're in the middle of an important project, finish it first, then update.
Try it
I went back to my Öschinensee photos with Furka, and for the first time they looked the way I remembered the place: bright snow with texture, deep shade that still has detail, and a clean sky above the ridge.
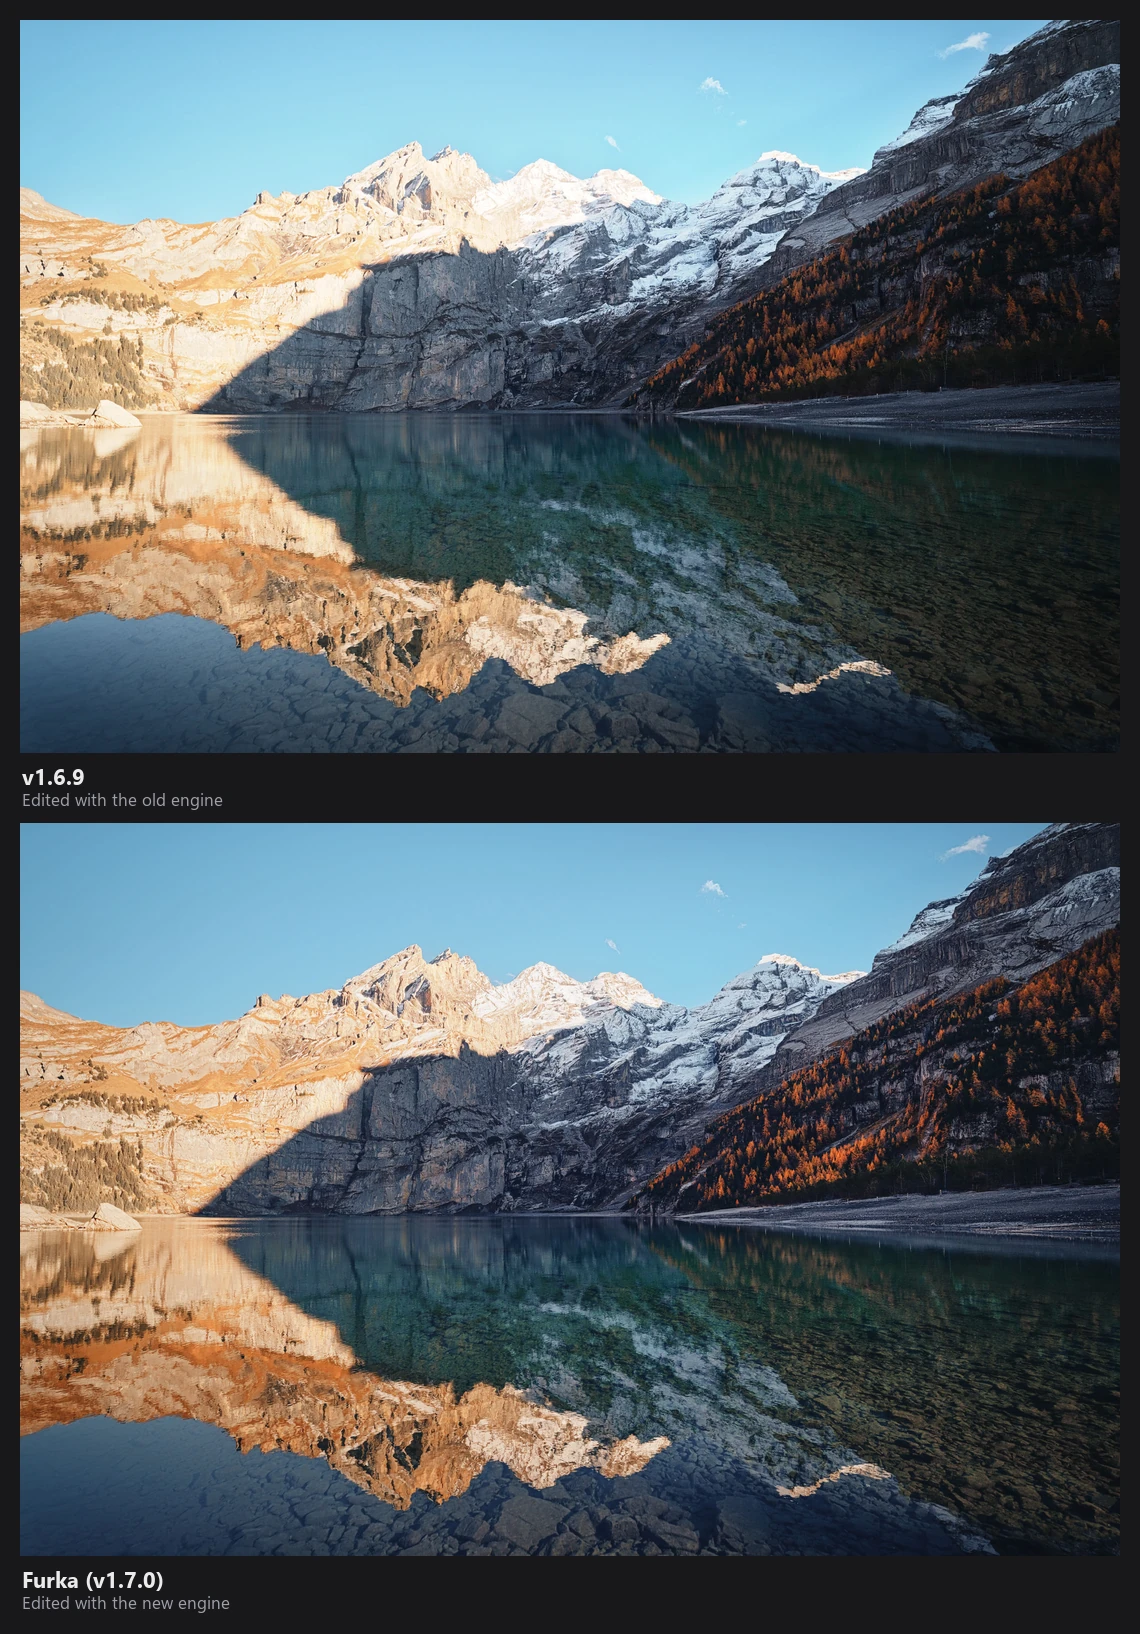
Furka is in RapidRAW v1.7.0. Open one of your hardest photos, the one with bright snow, deep shadows or a mountain against the sky, and see what it does. If you want the details of how each step works, the Technical Reference has them.
As always, I'd love to hear what you think on Discord, and if something looks wrong, please open an issue on GitHub.