Mask a Subject
This recipe shows the most common local-edit flow: select a subject with AI, refine the edges with a brush, and apply a local exposure/contrast bump to make the subject pop.
1. Open the photo and the Masks panel
Open the photo (Enter), then press M to open Masks.
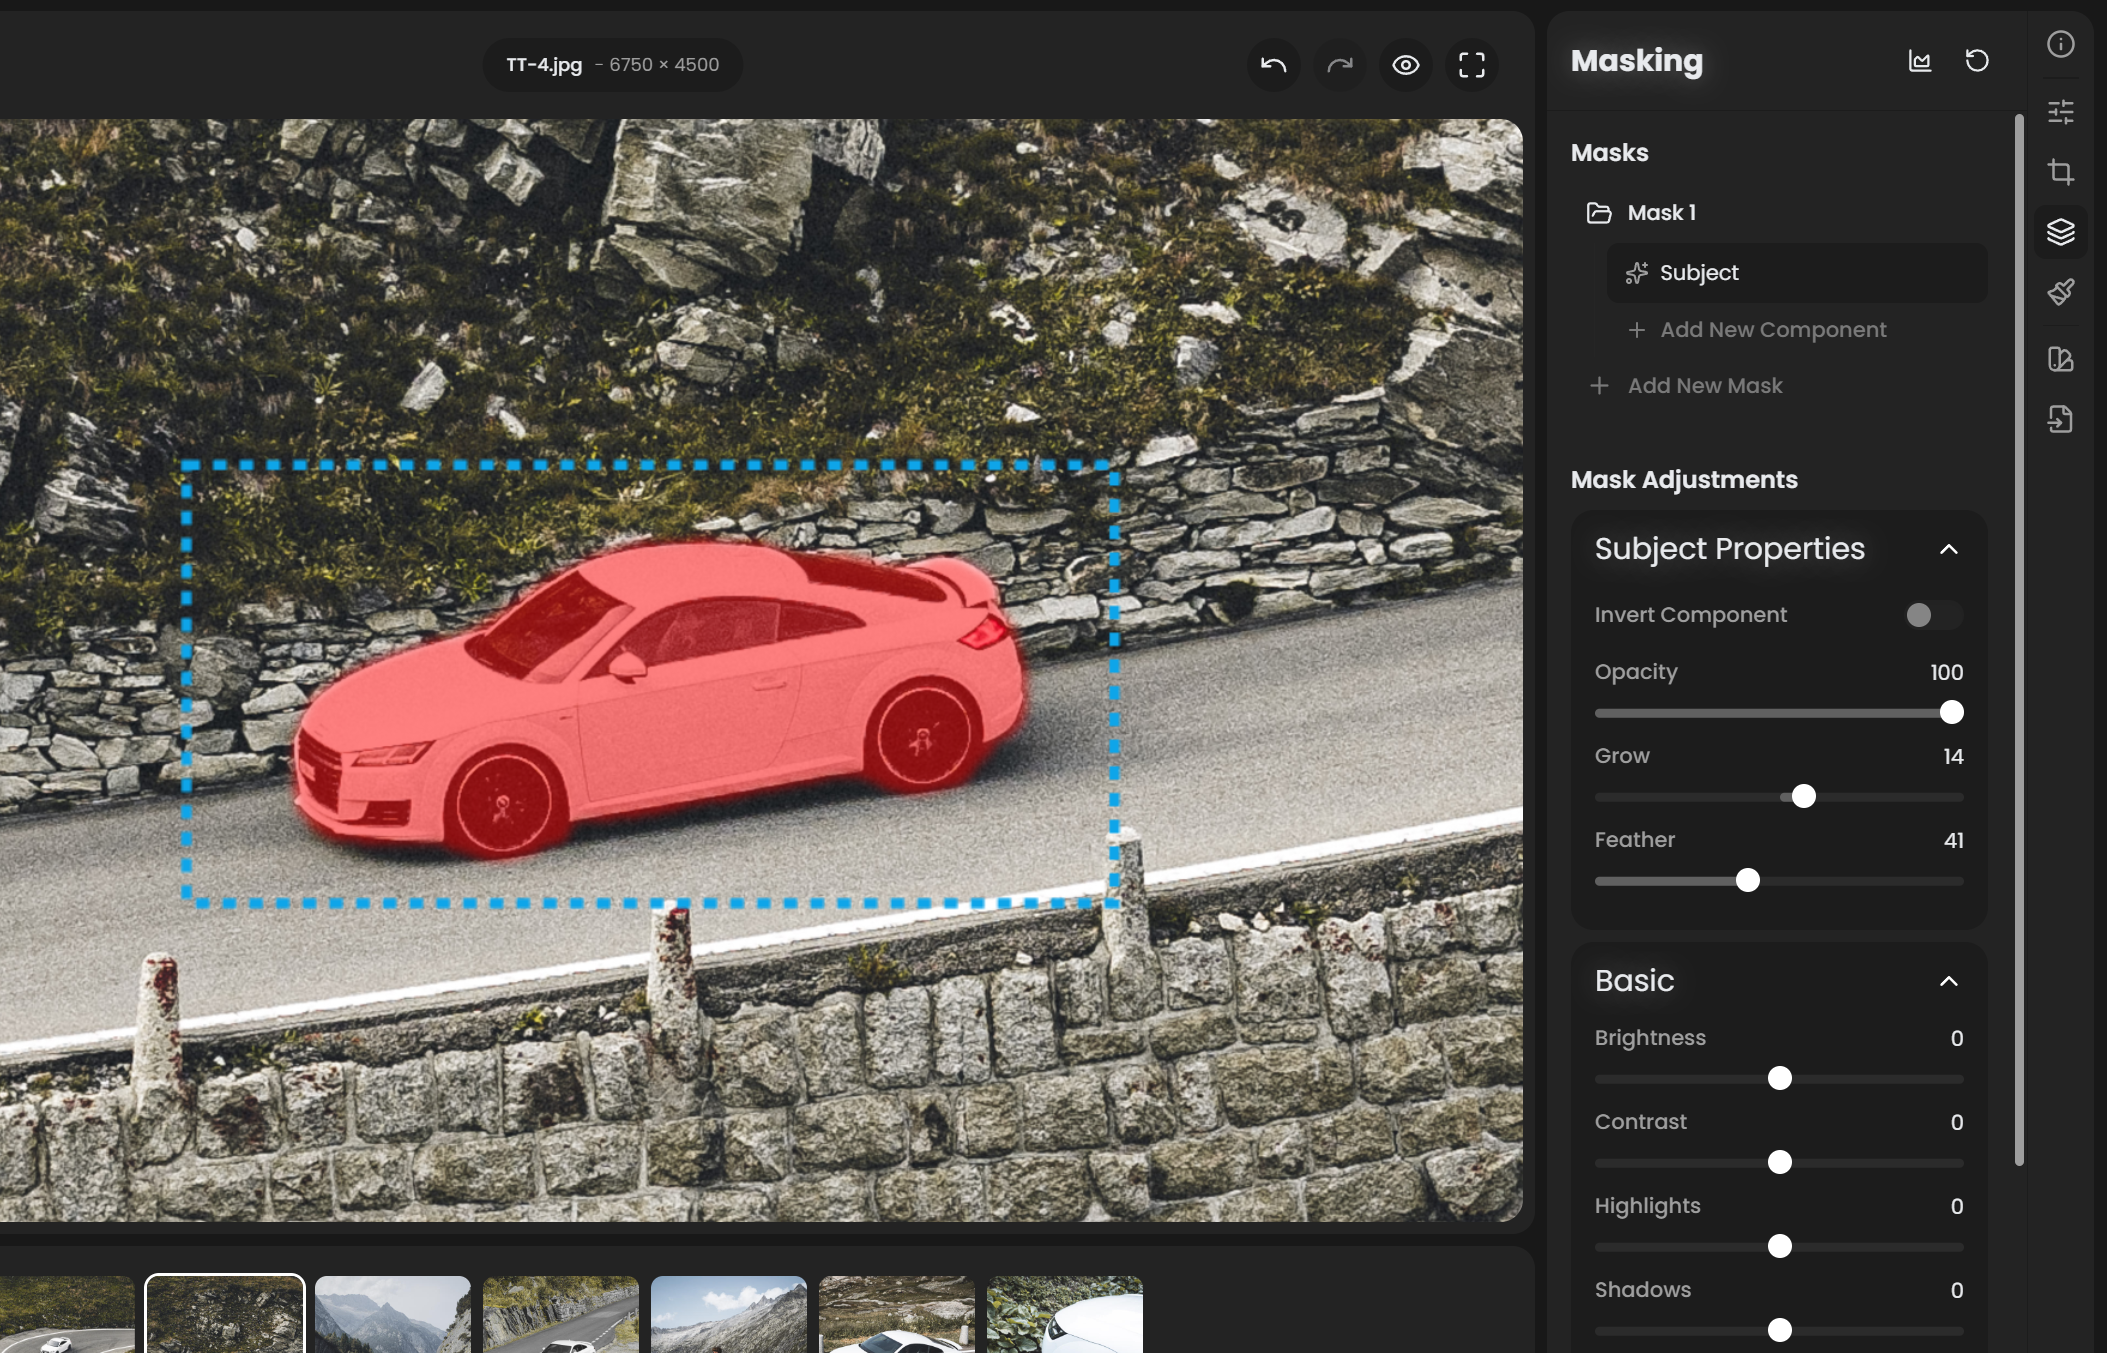
2. Create the AI subject mask
Click + New Mask → Subject. RapidRAW runs the segmentation model and produces a mask covering the main subject. AI segmentation runs on the CPU in the current build, so expect a few seconds.
3. Refine with a Brush submask (if needed)
The AI is good but not perfect. Common misses:
- Wisps of hair against complex backgrounds.
- Small regions between the subject's body and arms.
- Hands holding objects that get partially included.
To fix:
- With the mask container selected, click + Add Submask → Brush.
- Set the submask's Mode to Subtractive (to remove from the selection) or Additive (to add to it).
- Adjust Brush Size with
Ctrl+↑/Ctrl+↓(or the slider). - Paint over the area you want to fix.
Tip: zoom to 100% (Space until at 100%) for precise edge refinement.
4. Apply local adjustments
With the mask container selected, slide adjustments in the right panel. They apply only inside the mask. A typical "make subject pop" recipe:
- Exposure +0.3 to +0.5 (subtle brightening).
- Contrast +15.
- Clarity +20 (only mid-frequency contrast; good for faces and clothing).
- Whites +10 (a small lift on the brightest tones).
For portraits specifically, keep Clarity moderate (10 to 25); too much makes skin look harsh.
5. Compare with before/after
Press B to toggle off the edits and see the original. Toggle back on. The subject should now stand out from the background without the rest of the image changing.
6. (Optional) Darken the background separately
Make a second mask container that's the inverse of the subject:
- Click + New Mask → Subject again.
- Toggle the new container's Invert on.
- Apply: Exposure −0.3, Saturation −10.
Now the background is gently darker and less saturated, pulling more attention to the subject.
7. Name your masks
Right-click each mask container and rename: "Subject pop", "Background fade". When you come back to this photo in three months, you'll know what each mask is doing without clicking around.
When to use other mask types
| Situation | Best mask |
|---|---|
| Subject is centered, no need for AI | Radial: drop on the subject |
| Mostly landscape, no people | Foreground / Sky |
| Whole sky needs grading | Sky |
| Want a half-image gradient | Linear |
| Specific color (red dress, blue sky) | Color |
| Just the highlights | Luminance |
You can combine these freely. AI Subject + intersect with Color (skin tones) = "select only the subject's skin." Linear + intersect with Sky = "select only the upper half of the sky."
See also
- Masks for the full mask reference, including parametric and gradient types.
- Inpainting for object removal via Quick Erase.