Presets
A preset is a saved snapshot of adjustments: your current edit, ready to apply to any other photo with one click.
Open the Presets panel with P.
Two preset modes
RapidRAW supports two flavors of preset:
| Mode | What it stores | Typical use |
|---|---|---|
| Style preset | Tone & color settings only (Basic, Color, Curves, Effects). Skips Crop, Masks, sharpening details. | A look you want to apply across photos with very different content (a "warm cinematic" look). |
| Tool preset | A specific subset you choose. Can include Crop ratios, individual masks, or just one slider. | A recurring fix you make ("apply +30 Shadows everywhere," "always crop 16:9"). |
Pick the mode when saving.
Creating a preset
- Edit a photo until you like the result.
- Open Presets (
P). - Click + New Preset.
- Name it; pick Style or Tool mode; choose which adjustment groups to include.
- Save.
The preset appears in the list, with a small thumbnail showing its effect on the current photo as a preview.
Applying a preset
- Single photo: open the photo, go to Presets, click the preset.
- Multiple photos: select a range in the library (Ctrl/Shift-click), open Presets, click the preset. RapidRAW applies it to all selected photos.
Applying a preset doesn't lock anything. You can keep editing afterward; the preset is just a starting point.
Overwriting a preset
To update an existing preset with your current adjustments:
- Apply the preset.
- Make your changes.
- Right-click the preset and choose Overwrite with current adjustments.
The thumbnail re-renders to reflect the new state.
Organizing presets in folders
Drag presets into folders to group them ("Landscape", "Portrait", "B&W", "My Looks"). Folders are collapsible. Drag-and-drop reorders both presets and folders.
Import / Export
Right-click a preset (or folder) for Import and Export options. Presets are stored as small JSON files: easy to share, version, or sync across machines.
Common workflows:
- Backup: export your entire preset folder to keep with your image archive.
- Sharing: send
.jsonpreset files to friends or include them with downloadable galleries. - Cross-machine: export from one machine, import on another. No cloud sync needed.
Community Presets
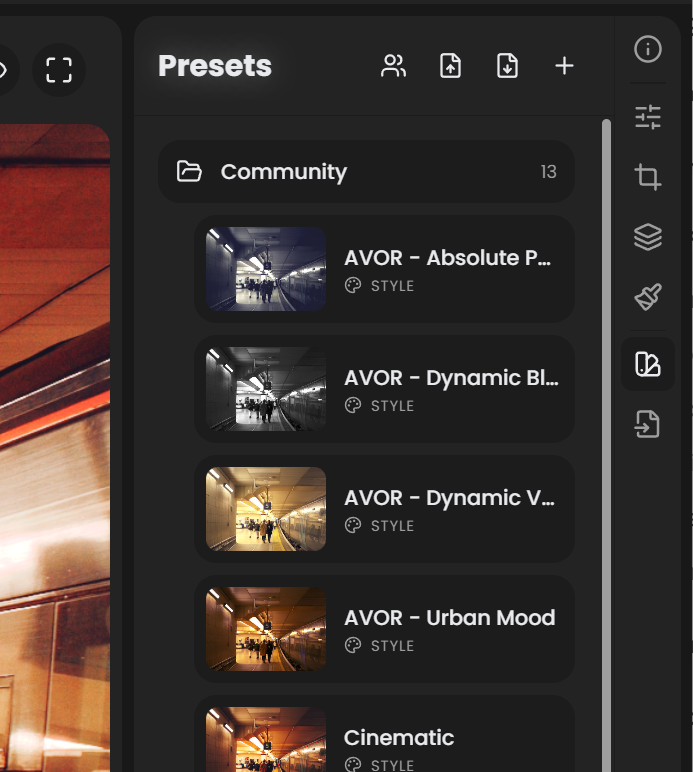
RapidRAW includes a built-in Community Presets browser maintained by the community. Open it from the Library header → Community Presets button (the people icon).
Each preset card shows a live preview rendered against an image from your current folder (or a default sample if your folder is empty). Hover and click Save to install the preset locally; from then on it appears in your normal Presets panel.
How it works under the hood
Community presets live in a separate GitHub repo: CyberTimon/RapidRAW-Presets. RapidRAW fetches the list and the preset JSONs over HTTPS the first time you open the browser. Previews are generated locally on your machine, not server-side.
Sharing your own preset
Want your preset featured in the Community browser?
- In RapidRAW, build the look you want to share. Save it as a preset locally so the JSON exists.
- Right-click the preset → Export to get the
.jsonfile. - Open a new issue on the RapidRAW-Presets repo using the Preset Submission template (this is the link the in-app browser shows at the bottom of the list).
- Attach your preset JSON, give it a clear name, and write your name as the creator.
- The maintainer reviews and merges the issue. Once merged, every RapidRAW user sees your preset in their Community browser.
The Discover presets created by the community strip at the bottom of the panel includes the same "Create an issue on GitHub" link.
What a preset stores
A preset captures the values of every included adjustment. Notably:
- Style presets do not include Crop, Masks, or any pixel-cleanup operations (Denoise, Quick Erase).
- Tool presets can include masks and crops if you select them when saving. Useful for "apply this exact gradient mask to every photo in the series."
- Presets are version-stable across RapidRAW updates. Old presets keep working after upgrades.
Auto adjustments
The Auto button is in the Adjustments panel header, not in the Presets panel. It analyzes the current photo (using thumbnail-cached statistics for speed) and suggests starting values across Basic, Color, and Curves.
Treat Auto as a starting point, then fine-tune. To apply Auto to many photos at once, multi-select in the library and click Auto from the Adjustments panel header.
See also
- Copy & Paste Settings for when you want to apply adjustments from one photo to another without saving a permanent preset.
- Workflows for how presets fit into a full editing pipeline.
- Tutorials for example edits you can save as presets.