Library View
The Library is where you browse, cull, rate, and organize. It's the screen RapidRAW opens to after you've picked a folder, and the screen you return to with Escape when you're done editing a photo.
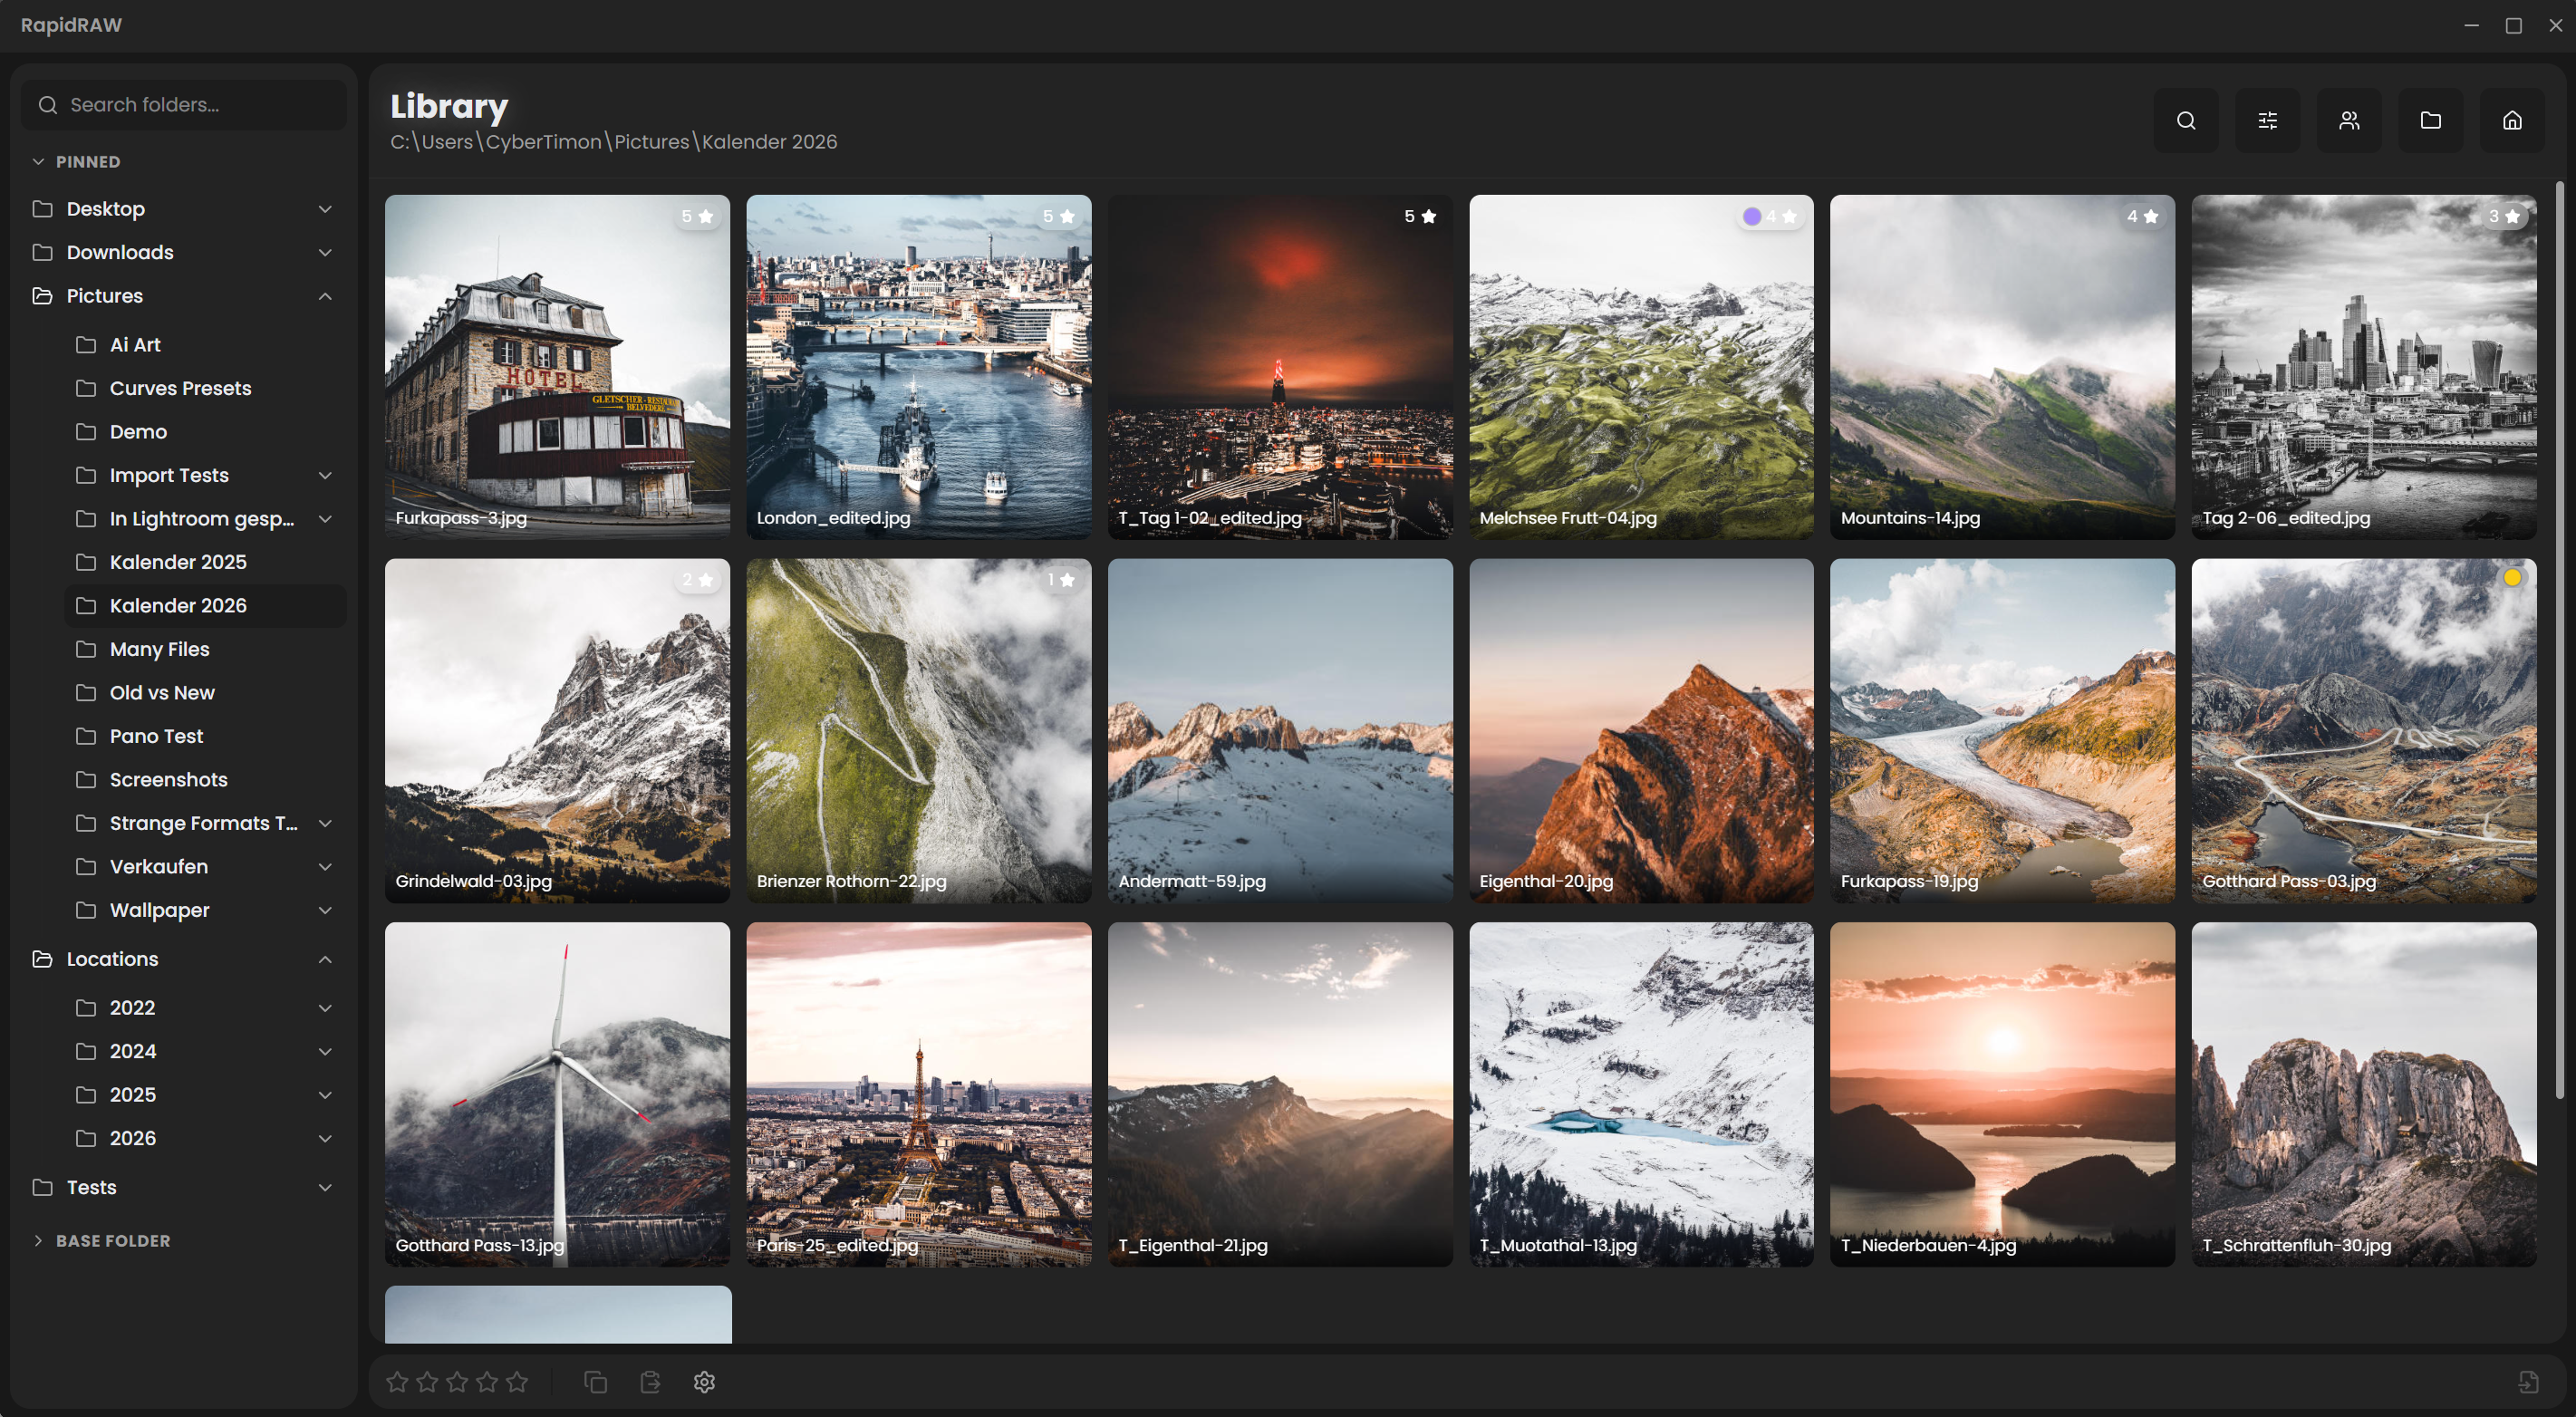
Layout
| Region | Purpose |
|---|---|
| Left sidebar | Folder tree under the active root, plus pinned folders. |
| Center grid | Thumbnails of all photos in the selected folder. |
| Top header | Library title + current folder path; controls for Search, View options, Community Presets, Open another folder, Go Home. |
| Right panel | Hidden by default. Slides in only when you click Export with one or more photos selected. It then shows the Library Export panel. |
There is no per-photo editing UI in the library; for that you open a single photo to enter the Editor View.
Selecting photos
- Click a thumbnail to select it (single selection).
Ctrl+Click(orCmd+Clickon macOS) to add or remove individual photos from the selection.Shift+Clickto select a range.Ctrl+A(orCmd+A) to select all photos in the current folder.Arrow ←/→/↑/↓to move the selection.
The number of selected photos is shown at the bottom. Most actions (export, rate, copy adjustments, delete) work on the entire selection.
Rating, color labels, tags
These are the workhorses of culling. They're stored in the photo's .rrdata sidecar.
| Action | Shortcut |
|---|---|
| Star rating 0–5 | Press 0 through 5 |
| Set color label | Shift+1 (red), Shift+2 (yellow), Shift+3 (green), Shift+4 (blue), Shift+5 (purple) |
| Clear color label | Shift+0 |
| Add tags | Use the Metadata panel (I) inside the editor |
Star ratings and color labels appear as small overlays on each thumbnail.
Sorting and filtering
The View Options dropdown in the header lets you sort by capture date, filename, rating, or color label, ascending or descending. Filtering by minimum rating or color label is also available, useful when culling a large shoot to your top picks.
Library view modes
In View Options, you can switch between:
- Current folder shows only the photos in the selected folder.
- Recursive flat list shows every supported image under the selected folder, regardless of subfolder.
Thumbnail size and thumbnail aspect ratio (Fill Square or Original Ratio) also live in this dropdown.
Multi-select actions
With multiple photos selected, you can:
- Copy adjustments from one photo and paste to all the others (
Ctrl+CthenCtrl+V). - Apply a preset from the Presets panel; it affects every selected photo.
- Right-click → Productivity for batch denoise, panorama stitch, HDR merge, negative convert. See Batch Processing.
- Export to open the Library Export panel and produce JPEG/PNG/TIFF/WebP/JPEG XL/AVIF/CUBE LUT outputs.
- Delete with
Delete(Windows/Linux) orCmd+Backspace(macOS).
Opening a photo for editing
- Double-click a thumbnail, or
- Press
EnterorSpacewith a single thumbnail selected.
The center switches to the editor canvas; the filmstrip appears at the bottom for jumping between photos without leaving the editor. Press Escape to come back.
Pinned folders
Right-click any folder in the tree and choose Pin folder. Pinned folders sit at the top of the sidebar across sessions; they're stored in Settings → General → Pinned folders.
Search
The search box in the library header filters by filename or tag. The folder tree on the left is its own navigation, not a search target.